Thursday, January 27, 2011

Open ERP Client Installation

The Windows client installation is very simple.

There are 6 stages :
1. Welcome message.
2. GPL Licence Acceptation
3. Shortcut in the Start menu.
4. Creation of a ‘Start’ icon on the desktop
5. Confirmation Choices
6. Automatic installation

You have to install, configure and run the Open ERP Server before using the Open ERP Client. The client needs the server to run. You can install the server application on your computer, or on an independent server accessible by network.

Downloading the Open ERP client

The Open ERP client can be downloaded from the Open ERP website’s download page.

Installing the Open ERP client

CLick on the executable installation file you’ve just downloaded and select the installation path


Starting the Open ERP client
The installation program creates shortcuts in the main program menu and on the desktop. Be sure to have an Open ERP Server running somewhere (on your computer or on a distant server) to be able to use the Client software.
Passwords:
Log in to TERP database using default username and password
• Username = admin
• Password = admin
OpenERP Web Installation
The installation is very simple. There are 5 stages :
1. Welcome message.
2. OEPL Licence Acceptation
3. Shortcut in the Start menu.
4. Confirmation Choices
5. Automatic installation
You have to install, configure and run the OpenERP Server before using the OpenERP Web. The web client needs the server to run. You can install the server application on your computer, or on an independent server accessible by network.

Downloading the OpenERP Web

The OpenERP Web can be downloaded from the OpenERP website’s download page

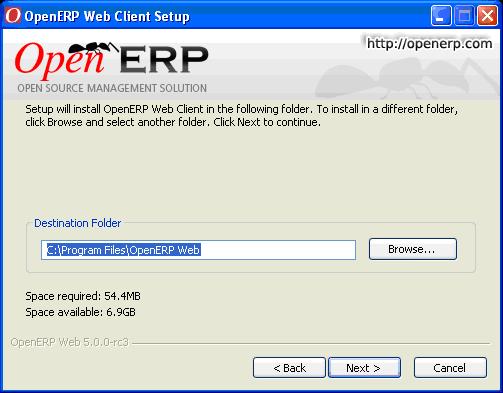
Installing the OpenERP Web

Click on the executable installation file you’ve just downloaded and select the installation path.


Preparing the web server for the first time run
The Windows service for OpenERP Web Server is installed during the installation and it’s set up to start the server automatically on system boot.

The configuration file is now automatically saved in the installation directory, in:
C:\Program Files\OpenERP Web\conf\openerp-web.conf

Starting the web server
Now as the web server is initialized and the settings are saved, you can finally start the OpenERP Web Server service.

Blackberry Installation with sample code


System requirements

Item
Requirement
development environment
One of the following development environments:
  • BlackBerry® Java® Plug-in for Eclipse® 1.1 or later with BlackBerry® Java® SDK 6.0
  • BlackBerry® Java® Development Environment 6.0
  • another third-party development environment, such as NetBeans™, that is running BlackBerry Java SDK 6.0

BlackBerry Smartphone Simulator or BlackBerry device
Any BlackBerry Smartphone Simulator or device that is running BlackBerry® Device Software 6.0 or later

Technical requirements

  • Eclipse 3.5 classic
  • 32-bit Windows® XP, Windows Vista™ or Windows 7 (Note: 64-bit versions require 32-bit Java and Eclipse)
  • Monitor with a resolution of 1024 x 768 or higher
  • PC with Intel® Pentium® 4 processor or compatible (2.5 GHz or higher, 2 GB RAM, 1.5 GB HD free)
  • Java® SE Development Kit (JDK) 6, update 10 or later.
BlackBerry Java Plug-in for Eclipse Update Site

Using the BlackBerry® Java® Plug-in for Eclipse® update site, you can download and install Eclipse® update components directly into an Eclipse install.
Follow the installation instructions below to learn how to download the BlackBerry® Java® SDK v6.0

Installation instructions

If you’re using Java® 2 SDK, Standard Edition v6.0, obtain Update 16 of the Java 2 SDK v6.0 from the Sun Microsystems website before downloading the plug-in using the Eclipse Update Mechanism.
  1. From the Help menu, select Install New Software to open the Install window.
  2. Click the Add button:
    1. In the Add Site dialog, type the URL http://www.blackberry.com/go/eclipseUpdate/3.5/java into the location text box and specify BlackBerry Java Plug-in Update Site in the name text box.
    2. Click the OK button, BlackBerry Update Site appears in the Available Software list.
  3. Select the BlackBerry Java Plug-in item and at least one BlackBerry Component Pack item you want to work on.
  4. Click the Next button.
  5. Click the Next button after reviewing the items to be installed (if the BlackBerry Java Plug-in for Eclipse was selected the first time, the BlackBerry Java SDK 5.0.0 is automatically selected if no other SDK was selected).
  6. Check the I accept the terms of the license agreement radio button after reviewing licenses.
  7. Click the Finish button to begin installation.
  8. Note: you'll need to enter your BlackBerry® Developer Zone login ID and password in an authentication dialog. Due to security policy, you may be authenticated multiple times. If you don’t have a BlackBerry Developer Zone login, register for access to the BlackBerry Developer Zone.
  9. After successfully downloading the files, you’ll be prompted to restart the Eclipse Platform. Choose to restart the platform.
Development Tools & Downloads

  • Web development
  • Themes and animated graphics
  • Java® development
Simulators
  • BlackBerry smartphone simulators
  • Download the BlackBerry email and MDS services simulator package v4.1.4


Coding :

import java.util.*;

import net.rim.device.api.system.*;

import net.rim.device.api.system.AccelerometerSensor.*;

import net.rim.device.api.ui.*;

import net.rim.device.api.ui.container.*;

import net.rim.device.api.ui.component.*;


/**

 * This sample demonstrates the Accelerometer API.  The DrawThread opens the

 * accelerometer channel and periodically queries for the current data reading.

 * The data is then used to apply corresponding force to a ball drawn on the

 * screen.

 */

public final class AccelerometerDemo extends UiApplication

{

    private AccelerometerDemoScreen _screen;

    private DrawThread _thread;


    private Bitmap _ball;

    private int _ballWidth;

    private int _ballHeight;  


    private int _x;

    private int _y;

    private float _xSpeed;

    private float _ySpeed;


    private Random _r;


    private boolean _simulated;  

    private Channel _accChannel;

    private short[] _xyz = new short[ 3 ];     


    private static final float G_NORM = 9.8066f / AccelerometerSensor.G_FORCE_VALUE;   

    private static final float TABLE_FRICTION = 0.98f;

    private static final float BOUNCE_SLOWDOWN = 0.6f;


    private static final int DEFAULT_ORIENTATION = Display.DIRECTION_NORTH;  


    private int _tick = 0; 


    /**

     * Entry point for application.

     * @param args Command line arguments (not used)

     */

    public static void main( String[] args )

    {

        // Create a new instance of the application and make the currently

        // running thread the application's event dispatch thread.

        AccelerometerDemo app = new AccelerometerDemo();

        app.enterEventDispatcher();

    }


    // Constructor

    public AccelerometerDemo()

    {

        if( AccelerometerSensor.isSupported() )

        {

            // Initialize UI

            _screen = new AccelerometerDemoScreen();

            _screen.addMenuItem(_startMenuItem);

            _screen.addMenuItem(_stopMenuItem);

            pushScreen( _screen );


            _ball = Bitmap.getBitmapResource( "img/ball.png" );

            _r = new Random();


            if( _ball != null ) {

                _ballWidth = _ball.getWidth();

                _ballHeight = _ball.getHeight();

            }


            // Prevent UI from rotating our screen.

            Ui.getUiEngineInstance().setAcceptableDirections( DEFAULT_ORIENTATION );

        }

        else

        {

            UiApplication.getUiApplication().invokeLater(new Runnable()

            {

                public void run()

                {

                    Dialog.alert("This device does not support accelerometer.");

                    System.exit(0);

                }

            });

        }

    } 


    /**

     * Calculates ball position.

     * @param xAcc x axis acceleration

     * @param yAcc y axis acceleration

     */

    private void applyForce( int xAcc, int yAcc )

    {

        // Calculate new speed.

        _xSpeed += xAcc * G_NORM;

        _ySpeed += yAcc * G_NORM;


        // Apply table friction.

        _xSpeed *= TABLE_FRICTION;

        _ySpeed *= TABLE_FRICTION;


        // Move the ball.

        _x += _xSpeed;

        _y += _ySpeed;


        if( _x < 0 )

        {

            _x = 0;

            _xSpeed = -( _xSpeed * BOUNCE_SLOWDOWN );

        }

        else {

            int screenWidth = _screen.getWidth();

            if( _x > screenWidth - _ballWidth )

            {

                _x = screenWidth - _ballHeight;

                _xSpeed = -( _xSpeed * BOUNCE_SLOWDOWN );

            }

        }


        if( _y < 0 )

        {

            _y = 0;

            _ySpeed = -( _ySpeed * BOUNCE_SLOWDOWN );

        }

        else {

            int screenHeight = _screen.getHeight();

            if( _y > screenHeight - _ballHeight )

            {

                _y = screenHeight - _ballHeight;

                _ySpeed = -( _ySpeed * BOUNCE_SLOWDOWN );

            }

        }

    }


    /**

     * A thread class to handle screen updates.

     */

    private class DrawThread extends Thread

    {

        private boolean _running;          


        public void run()

        {

            _running = true;


            // Start querying the accelerometer sensor.

            openAccelerometerConnection();


            while( _running )

            {

                _tick++;


                // Get current acceleration.

                readAcceleration();


                // Apply force to the ball.

                applyForce( -_xyz[ 0 ], _xyz[ 1 ] );


                try

                {

                    synchronized( this )

                    {

                        wait( 50 );

                    }

                }

                catch( InterruptedException e )

                {

                    UiApplication.getUiApplication().invokeLater(new Runnable()

                    {

                        public void run()

                        {

                            Dialog.alert("wait(long) threw InterruptedException");

                        }               

                    });

                }


                if( !_running )

                {

                    break;

                }


                _screen.invalidate();

            }


            // Stop querying the sensor to save battery charge.

            closeAccelerometerConnection();

        }

    }


    /**

     * Opens the data channel.

     */

    private void openAccelerometerConnection()

    {

        if( DeviceInfo.isSimulator() )

        {

            _simulated = true;

        }

        else

        {

            _accChannel = AccelerometerSensor.openRawDataChannel( AccelerometerDemo.this );

            _simulated = false;

        }

    }


    /**

     * Gets the latest acceleromenter data.

     */

    private void readAcceleration()

    {

        if( _simulated )

        {

            // Running in a simulator, simulate random.

            if(_tick % 10 == 0)

            {

                _xyz[0] = (short) ( _r.nextInt( 400 ) - 200 );

                _xyz[1] = (short) ( _r.nextInt( 400 ) - 200 );

            }

        }

        else

        {

            // Real device, call the API for samples.

            _accChannel.getLastAccelerationData( _xyz );

        }

    }


    /**

     * Closes the data channel.

     */

    private void closeAccelerometerConnection()

    {

        if( _accChannel != null )

        {

            _accChannel.close();

            _accChannel = null;

        }

    }


    /**

     * Menu item to start the ball moving.

     */

    private MenuItem _startMenuItem = new MenuItem("Start" , 0, 0)

    {

        public void run()

        {

            if(_thread == null)

            {

                // Start drawing

                _thread = new DrawThread();

                _thread.start();

            }


        }

    };


    /**

     * Menu item to stop the ball moving.

     */

    private MenuItem _stopMenuItem = new MenuItem("Stop" , 0, 0)

    {

        public void run()

        {

            if( _thread!= null )

            {

                synchronized( _thread )

                {

                    _thread._running = false;

                    _thread.notifyAll();

                    _thread = null;

                }

            }           

        }

    };


   /**

    * A screen on which to display the ball.

    */

    private class AccelerometerDemoScreen extends MainScreen

    {

        /**

         * @see Screen#paint(Graphics)

         */

        protected void paint( Graphics graphics )

        {

            if( _ball != null )

            {

                graphics.drawBitmap( _x, _y, _ballWidth, _ballHeight, _ball, 0, 0 );

            }

        }


        /**

         * @see Screen#onClose()

         */           

        public boolean onClose()

        {

            if( _thread != null )

            {

                synchronized( _thread )

                {

                    _thread._running = false;

                    _thread.notifyAll();

                }

                Thread.yield();

            }

            return super.onClose();

        }

    }

}

Install the sample application

·  On the taskbar, click Start > Programs > Research In Motion > BlackBerry JDE 4.7.0 > JDE.
·  Open the workspace that you want to add the sample application to.
·  In the workspace tree, right-click the project that you want to add the sample application to.
·  Click Add project to <workspace directory>.
·  In the Add project to <workspace> dialog box, browse to the folder where you extracted the sample application.
·  Click the AcceleratometerDemo.jdp file.
·  Click Open

Run the sample application

  1. In the workspace where you added the accelerometerdemo project, right-click accelerometerdemo.
  2. Click Build project.
  3. On the taskbar, click Start > Applications > Research in Motion > BlackBerry JDE 4.7.0 > Device Simulator.
  4. On the Home screen of the BlackBerry® Smartphone Simulator, click the Downloads folder.
  5. Click the accelerometerdemo icon.
  6. In the accelerometer sample application, press the Menu key.
     7.  Click Start. 

Monday, January 24, 2011

What Is LINQ? And How to install it?

LINQ is a combination of namespaces and C# 3.0 language enhancements. Through the very clever use of generics and other powerful new features of .NET 2.0 and using some functional programming techniques (like those natively available in F#), LINQ provides a high-level abstraction of virtually any data and emulates the query operations of the relational model. The LINQ Project seems to be just the beginning of many other future dramatic enhancements to .NET and .NET languages.

LINQ has three major components:
• LINQ to Objects
• LINQ to ADO.NET, which includes
o LINQ to DataSet (originally called LINQ over DataSet)
o LINQ to Entities
o LINQ to SQL (originally called DLinq)
• LINQ to XML (originally called XLinq)
LINQ to Objects deals with in-memory data. Any class that implements the IEnumerable interface (in the System.Collections.Generic namespace) can be queried with SQO. 

LINQ to ADO.NET deals with data from external sources, basically anything ADO.NET can connect to. Any class that implements IEnumerable or IQueryable (in the System.Query namespace) can be queried with SQO.


LINQ to XML is a comprehensive API for in-memory XML programming. Like the rest of LINQ, it includes SQO, and it can also be used in concert with LINQ to ADO.NET, but its primary purpose is to unify and simplify the kinds of things that disparate XML tools, like XQuery, XPath, and XSLT, are typically used to do. In this chapter we’ll preview LINQ to SQL and LINQ to DataSet, since they’re most closely related to the C# database programming covered in this.

Installing LINQ
 

installing LINQ doesn’t replace any .NET 2.0 assemblies, but it does change our VCSE development environment, adding some new project types that support LINQ and use the C# 3.0 compiler
The May 2006 LINQ CTP (Community Technology Preview) can be downloaded from the LINQ Project home page, http://msdn.microsoft.com/data/ref/linq/. Go there and click Microsoft Visual Studio Code Name "Orcas" - LINQ CTP (May 2006), which will take you to the download page. It’s small enough to just run the download if you have a reasonably fast Internet connection, but we save it to c:\bcs2005db\install.11
 

To install LINQ:
 

1. Run LINQ Preview (May 2006).msi, which starts the LINQ installation process. When the Welcome window appears (see Figure), click Next.

2. When the License Agreement window appears (see Figure), click the I Agree radio button and when the Next button is enabled, click it. 


LINQ installation Welcome window


LINQ License Agreement window


3. When the Update C# Language Service for LINQ window appears (see Figure), click the Update C# Language Service radio button and click Next.

4. When the Confirm Installation window appears (see Figure), click Next.

5. A progress window appears (see Figure). When the Next button is enabled, click it.


Update C# Language Service for LINQ window


LINQ Confirm Installation window

6. When the Installation Complete window appears (see Figure 18-6), click Close. LINQ is now installed, and you’ll find a lot of useful things in C:\Program Files\LINQ Preview. (We recommend you look at ReadMe for C#.htm.)


7. Open VCSE and create a new project. You should see the four new templates for LINQ shown in Figure  Select LINQ Console Application, change the project name to Chapter18, and click OK.


8. A message box will alert you to your use of an unsupported version of C# 3.0 (see Figure). Don’t worry, it works well enough for this chapter (in fact, it works quite stably). Click OK.


9. In Solution Explorer, expand the References node. Note the four new assemblies (System.Data.DLinq, System.Data.Extensions, System.Query, and System.Xml.XLinq) VCSE automatically provides (see Figure ).

10. Double-click Program.cs. Note the three new namespaces (System.Query, System.Xml.XLinq, and System.Data.DLinq) VCSE automatically provides using directives for (see Figure 18-10). Save the solution. We’re ready to do some LINQ database programming. 


Using LINQ to SQL

LINQ to SQL is a facility for managing and accessing relational data as objects. It’s logically similar to ADO.NET in some ways but views data from a more abstract perspective that simplifies many operations. It connects to a database, converts LINQ constructs into SQL, submits the SQL, transforms results into objects, and can even track changes and automatically request database updates.
A simple LINQ query requires three things:
·         An entity class
·         A data context
·         A LINQ query

Coding a Simple LINQ to SQL Query

use LINQ to SQL to retrieve all customers from the Northwind Customers table.
1. Rename the Chapter18 project in the Chapter18 solution to LinqToSql, then rename Program.cs to LinqToSql.cs. Replace the code in LinqToSql.cs with the code in Listing 18-1.
LinqToSql.cs
using System;
using System.Collections.Generic;
using System.Text;
using System.Query;
using System.Xml.XLinq;
using System.Data.DLinq;
 
namespace Chapter18
{
   [Table]
   public class Customers
   {
      [Column(Id=true)]
      public string customerId;
      [Column]
      public string companyName;
      [Column]
      public string city;
      [Column]
      public string country;
   }
 
   class Linq To Sql
   {
      static void Main(string[] args)
      {
         // connection string
         string connString = @"
            server = .\sqlexpress;
            integrated security = true;
            database = northwind
         ";
 
         // create data context 
         DataContext db = new DataContext(connString);
 
         // create typed table 
         Table customers = db.GetTable();
 
         // query database
         var custs =
            from c in customers
            select
               c
         ;
 
         // display customers
         foreach (var c  in custs)
            Console.WriteLine(
               "{0} {1} {2} {3}",
               c.customerId,
               c.companyName,
               c.city,
               c.country
            );
      }
   }
}
2. Run the program with Ctrl+F5 and you should see results as in Figure  (which displays the last ten rows).


QT Development Tools

Qt Creator: Cross-Platform IDE

Qt Creator is a cross-platform integrated development environment (IDE) tailored to the needs of Qt developers. It provides:
  • C++ and JavaScript code editor
  • Integrated UI designer
  • Project and build management tools
  • gdb and CDB debuggers
  • Support for version control
  • Simulator for mobile UIs
  • Support for desktop and mobile targets

Platforms

Qt is a cross-platform application and UI framework.

Platforms: Embedded Linux, Mac OSX, Windows, Linux/X11, Windows Mobile, Windows CE, Symbian, Maemo and MeeGo.

Select Your Platform

Qt supports the following platforms:

Qt for Nokia Platforms

Qt is the de-facto development framework for Nokia Symbian and Maemo/MeeGo devices.


Qt for Mobile Platforms

Mobile development with Qt

·  Design an innovative user experience
·  Develop compact, high-performance applications
·  Target Symbian/S60, Maemo, MeeGo and Windows Mobile devices
·   Port your mobile applications to the desktop on Windows, Mac and Unix/Linux.

What's the difference between the Nokia Qt SDK and the Qt SDK?

The Nokia Qt SDK is a mobile specific version of the Qt SDK for targeting Nokia devices.
Nokia Qt SDK
Qt SDK
Feature/Component
Comments
icon-checkbox-yes.png
Qt source

icon-checkbox-yes.png
Qt Creator

icon-checkbox-no.png
icon-checkbox-yes.png*
Qt binary build - Windows
* Qt SDK for Windows
icon-checkbox-no.png
icon-checkbox-yes.png*
Qt binary build - Linux
* Qt SDK for Linux
icon-checkbox-no.png
icon-checkbox-yes.png*
Qt binary build - Mac
* Qt SDK for Mac
icon-checkbox-yes.png
icon-checkbox-no.png
Qt binary build - Symbian

icon-checkbox-yes.png
icon-checkbox-no.png
Qt binary build - Maemo

icon-checkbox-no.png*
Qt binary build - MeeGo
* under roadmap review
icon-checkbox-no.png
Qt binary build - Windows Mobile

icon-checkbox-no.png
Qt binary build - Windows CE

icon-checkbox-yes.png*
icon-checkbox-yes.png
Developer environment - Windows
* Symbian and Maemo support
icon-checkbox-yes.png*
icon-checkbox-yes.png
Developer environment - Linux
* Maemo support
icon-checkbox-no.png*
icon-checkbox-yes.png
Developer environment - Mac
* Maemo support
icon-checkbox-yes.png
Debugger support

icon-checkbox-yes.png
icon-checkbox-no.png*
Qt APIs for mobile development
* available as add-on
icon-checkbox-yes.png
icon-checkbox-no.png
Build tool chain - Symbian/S60

icon-checkbox-yes.png
icon-checkbox-no.png
Build tool chain - Maemo

icon-checkbox-yes.png
icon-checkbox-no.png
Qt Simulator

13 MB
icon-checkbox-no.png
Package size - online installer

840 MB
<500 MB
package size - offline installer

QT Programming Language Support

The Qt API is implemented in C++, and provides additional features for easier cross-platform development. QML – introduced with Qt 4.7 – QML is a JavaScript-based declarative, language designed to describe the user interface of a program: both what it looks like, and how it behaves. Bindings to Qt exist for several other languages, including Ada, Pascal, Perl, PHP, Ruby, Python and Java.

C++ Development with Qt

Qt provides an intuitive C++ class library with a rich set of application build blocks for C++ development. Qt goes beyond C++ in the areas of inter-object communication and flexibility for advanced GUI development. Qt adds the following features to C++:
  • Powerful mechanism for inter-object communication called signals and slots
  • Queryable and designable object properties
  • Powerful events and events filters
  • Contextual string translation for internationalization
  • Sophisticated interval driven timers that make it possible to elegantly integrate many tasks in an event-driven GUI
  • Hierarchical and queryable object trees that organize object ownership in a natural way
  • Guarded pointers that are automatically set to 0 when the referenced object is destroyed, unlike normal C++ pointers which become dangling pointers when their objects are destroyed
  • A dynamic cast that works across library boundaries.
  •  

QML Development with Qt

QML is a declarative, JavaScript-based language designed to describe the user interface of a program: both what it looks like, and how it behaves.

·  JavaScript, HTML and CSS skills can be used to code complete apps
·  Optimized for touch-based, animated mobile UIs
·  Includes a set of graphical and behavioural building blocks: QML Elements
·  No C++ knowledge required, but can be extended with C++.


Additional Language Bindings

Qt bindings exist for several other languages
·  Python: PyQt and PySide
·  Ada
·  Pascal
·  Perl
·  PHP
·  Ruby

Qt for Java Development

Qt Jambi – Qt bindings to the Java programming language – has been discontinued in order to focus resources on the Qt cross platform application and UI framework. Qt Jambi is available for download under the LGPL v2.1 license at http://qt.nokia.com/downloads.